Tuesday, October 9, 2012

Halloween Chandelier

Any old light will do- Spray Paint Black
Gather Supplies for stringing! I got mine at a great wearhouse sale at DCWV inc. They also have these great
supplies online here. 

 String your beads together 

 Here is where it got a little more involved. To attach the strings, I used a small drill bit and drilled
holes in the chandelier where i wanted all the beads to attach. Then threaded the ends of my stings
though the holes drilled, and tied them off  and secured with a bead and a dot of super glue.
 After stringing the entire chandelier. I attached skulls and Ravens. Both items
I found at the Dollar Store. I then epoxied the solar lights into place (also a popular pin floating 
on Pinterest)


There was much debate on where to hang it. Outside or Inside.

Friday, September 21, 2012

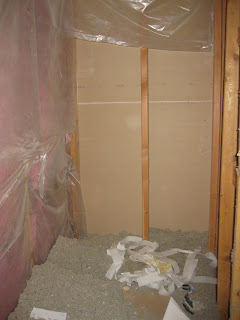
The space behind the walls turned into a play area for the kids


The first part is demo. Tear the wall out between the two areas and clean out all the insulation.


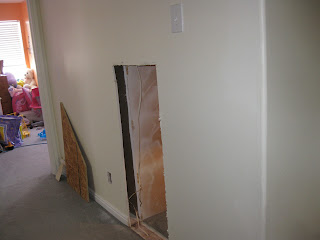
I cut a hall entrance.


Shot from the bedroom looking into the closet and then into the wall space.
Shot from the closet looking toward the bottom L of the wall space.
Because I can't move the vents, I just made a little entrance beside them going through the closet. I lost some shelf space but its a bigger closet so I wasn't worried.
Looking from the bottom L towards the hall.
Looking from the hall towards the bottom L.

Crappy side view video taken with my phone during the construction process.

Here is a map of the area I found behind the walls.


Hallway entrance looking towards the stairs.


Adding the second level.

Framing it in.


Adding the second level floor.

 Looking from the bottom L, top level, towards the closet entrance.

 Starting to sheetrock.
 Wired for lighting and power. 


 Closet entrance, upper level.
 Closet entrance, lower level.

This is still a work in progress. The sheetrock is in mudded and painted. I will upload pictures later.

Friday, May 18, 2012

Entertainment Center

This Project was motivated by the fact that I didn't like the cords hanging down from the mantle unto the coffee table/entertainment center. I wanted them hidden. This turned into a two sided entertainment center. The next thing I knew I was in it up to my neck in wood.


Planning:
Here is a concept sketch along with what it used to look like.

Another concept sketch, slightly improved. There was actually a 3-D rendering I did up in Pro-E that I won't  bother with here.
Note: the new couches

 And another:

I buried a pvc pipe in the wall from the TV to the cabinet so I will be able to pull new wires through as the new technology comes out each year. I also moved the power outlets up the wall to the cabinet level. The speaker wire and internet cables are run under the crown molding.


Dimensions:


Construction:
It was essentially made in four separate pieces two lower and two upper.
The drawers were designed to perfectly fit dvd/blue ray cases although a few drawers have since been claimed as electronics junk drawers.


There was nothing special about the wood except it is the better stuff from the hardware store. I ended up only adding pvc through to the left side because I could run the wires to the right side under the crown molding up above.

Base boards and crown going up.
The bottom shelves were designed with enough space to house a server and printer.


Paint:
I strongly recommend making a spray booth out of plastic because I am still finding over spray of everything I didn't cover.
You can see my beautiful and very pregnant wife helping me distress the cabinets by sanding the black lacquer paint back to the wood. After which we wiped a burnt umber stain on those distressed spots to give it a 'painted over' look, after which I clear coated everything with several coats.


Reassembling them in place and securing them to the studs in the wall.

Finished product!


Close ups


I installed some touch panel flush mount lighting.